Lids (not to be confused with lids and bands)
5% acid white vinegar
Non-iodized salt
Dried red peppers/chiles de arbol
Dill seed
Garlic (1 large clove per jar)
She provided:
Quart- and pint-sized jars (bought at the thrift shop for 10 cents apiece and washed/sterilized at home)
Wide-mouth bands (bands can be reused, but DO NOT reuse the lids--they create a seal and reusing them can put you at risk for unwanted enzymes)
Fresh cucumbers from a friend's farm, fresh and dried dillweed,
A huge stock pot and a homey kitchen to cook in. Talk about childhood memories.
Here, Ryan is preparing the garlic. With a meat cleaver. That's my sweet Mom in the background--I can't believe I left without a better pic of her!
 Meat cleaver WHACKS the garlic. Very satisfying. Sha-bam.
 Fresh cucumbers from the Mayer family farm in Granger. Aren't they cute?
 Prepping the jars: one red chile, one large clove of garlic...
Then the dill: fresh, dried, or seed. We did a couple of heads of dill, and then added about 1/2 tsp of dill seed.
At this point, we started the brine (recipe below). It needs to come to a gentle rolling boil, and be prepared to make more as you go to be sure and fill up the jars.
 And then--of course--the cucumbers. They had to be packed very tightly. My mom showed me a trick: use the handle of a wooden spoon to pack them down and squeeze 'em in.
 Also, we soaked the lids in hot water on the stove to loosen the rubber seal. As we needed the lids, we grabbed them out of the hot water, topped off the jar with it, and then screwed on the band--but not too tight. You need enough air in there for the seal to release some and then pop to the jar.
 Pour on the brine, clean the lips of the jars, and voila! You're ready to pickle! We did one small jar of garlic at Ryan's request and two small jars of okra from the farmer's market.
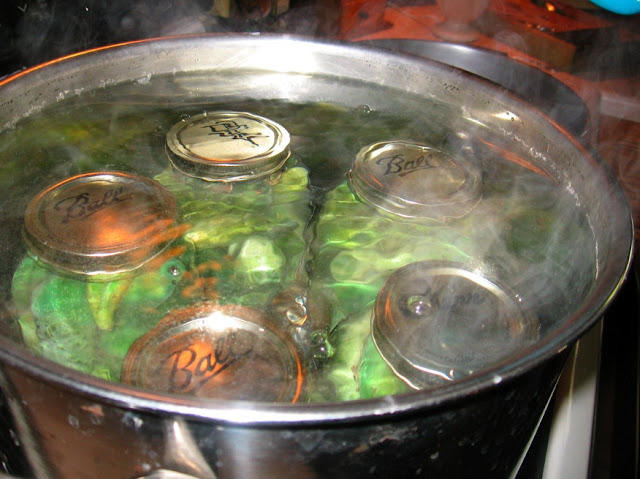
  Ryan lowered the jars slowly into the water bath to be sure not to shock the glass. You need a pot big enough to hold the jars and enough water to cover them completely. They sat in the water bath for 20 minutes: this is what processes the jars and creates the seal. It stops any enzymes from forming that could cause nasty things. If I knew how to spell these nasty things, I'd post them--but suffice it to say, you want to make sure you're doing a proper water bath.
 And, be careful that your jars are nice and hot BEFORE you lower them into the water bath (the hot brine should bring it to the right temp). We had one jar that hadn't gotten hot enough because it was in the fridge (mom had run out of brine the day before and saved the jar for today) and it cracked when we put it in the bath. Kind of cool....but we had to scoop out the cucumbers and wash them so we could try again. With a room-temp jar and hot brine.
 Boil, boil, toil and trouble....
 The almost-finished product. We had 100% success rate: all the jars gave a super-satisfying POP to let us know they were sealed. Now, they just sit for a couple of weeks. We are counting down the hours until we can sample the goods.
  A treat for you, dear readers: my grandmother's recipe. Use it wisely (and make plenty of jars--they'll fly from your shelves like hotcakes).


0 comments:
Post a Comment